

Use these directions to put together your group’s physical Dreamline or Dreamlines!
Dreamline Banners are meant to reach the world. Attaching them to a line for display is one of the most exciting moments. Here’s what to remember…
– SIGNAGE BANNER –
It’s important for the community to know who made the Banners and what Dreamline is.
Download and print the signage banner on paper, then write in your organization’s name and the group.
Example: “Ms. Horowitz’s 3rd Grade at Albert M. Greenfield Elementary School”
– LINE FOR ATTACHING –
RECOMMENDED
- CLOTH RIBBON: Durable and easy to attach to. You can also use cotton bias binding tape. It also works well and can be less expensive.
- TWINE: Also durable. Not as easy to attach to but still works and is less expensive.
NOT RECOMMENDED
- String: Difficult to attach to and Banners tend to slide.
- Yarn: Tends to break and difficult to attach to.
- Rope: Tends to be too thick and makes storage and transport challenging.
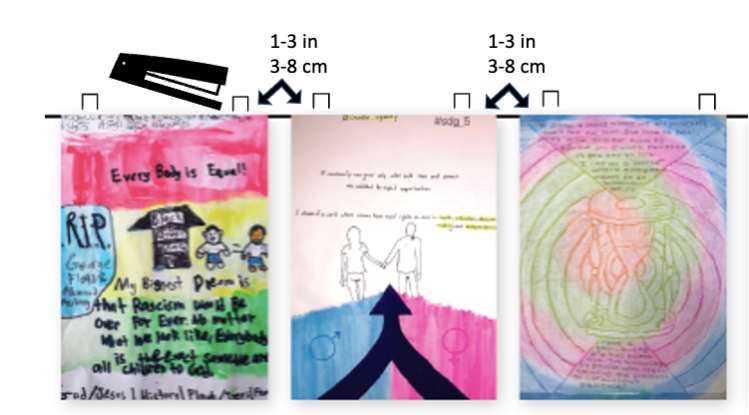
– ATTACHMENT METHODS –
- Stapler: Easy and durable. Also you can easily remove them. A quick way for this method is to put up you line first, then staple your Banners to it.
- Sewing: Most durable. This can go quickly with a sewing machine. It is best for outdoor displays where Banners which will be up for a while.
- Glue (Hot or Regular): This binds fairly well and makes a very clean looking presentation. Can be quick with hot glue. Will not bind to all substances.
– LENGTH, LAYOUT & SIGNAGE –
- Length: A good maximum length is 35 Banners. Lines longer that they get very difficult to store and display. Make multiple lines.
- Layout: As pictured, leave 1-3 in or 3-8 cm between Banners.
- Signage: Put at least 1 Signage Banner on each line. Staple it to the beginning of the line, the end, or both.
